Last updated
26th June 2026
Introduction
This guide will walk you through the steps required to get SmartFlo up and running in your organisation.
We’re excited to introduce version 2, which includes a range of new tools and services designed to enhance your experience and productivity.
Thank you for your continued support — we hope you find SmartFlo both valuable and enjoyable to use. If you encounter any issues or need assistance, please don’t hesitate to contact us at help@ithink365.co.uk. A member of our team will be happy to assist you.
Pre-requisites
Before proceeding with the installation of SmartFlo, please ensure the following requirements are met:
Your organisation must be actively using Microsoft Teams.
Additionally, at least one user must have the following Microsoft Entra ID roles assigned:
Teams Administrator – Required to add the iThink365 SmartFlo application to the Microsoft Teams App Catalogue.Global Administrator – Required to grant the necessary permissions and consent to the SmartFlo API application within your Microsoft 365 tenant.
Sign in to SmartFlo
To begin, you’ll need to sign in to SmartFlo. Ideally, this step should be completed by a user with Global Administrator permissions.
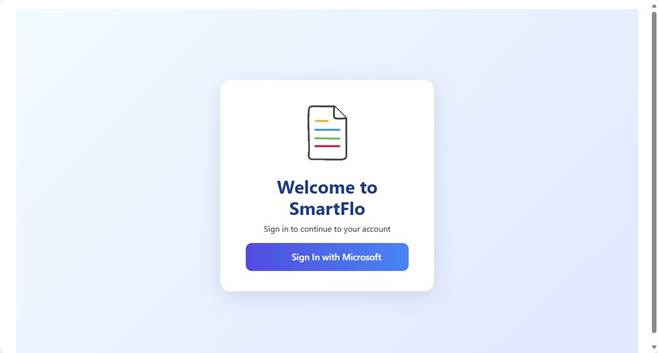
Click the Sign In link and log in with your Microsoft 365 credentials if prompted.
- SmartFlo requires Microsoft Entra admin consent. Please grant admin approval when prompted.
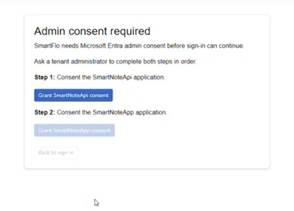
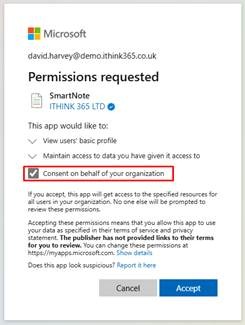
- Note:This consent allows SmartFlo to access your name and email address for configuration purposes.
- Tick the box labelled “Consent on behalf of your organisation”, then click Accept to continue.
- If you are the first person from your organisation to sign in to SmartFlo, you will be guided through the First Run Experience. At this stage, you should see the following screen. Click ‘Start’ to begin:
 |
- Follow the on-screen prompts and verify that your login name, display name, and organisation name are correct.
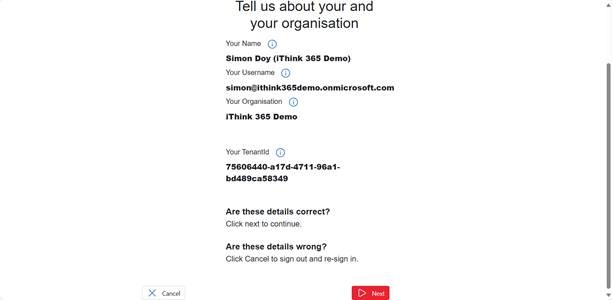
1. If the information is correct, click Next to continue. If not, or if you’ve signed in with the wrong account, click Cancel to exit the setup.
1. Tick the option to Enable Automated User Onboarding to allow users from your organisation to automatically gain access to SmartFlo. Then, provide the email address that should be used for general administrative notifications. Then click Save.
Note: Users will still require a licence and the appropriate permissions before they can begin using SmartFlo.
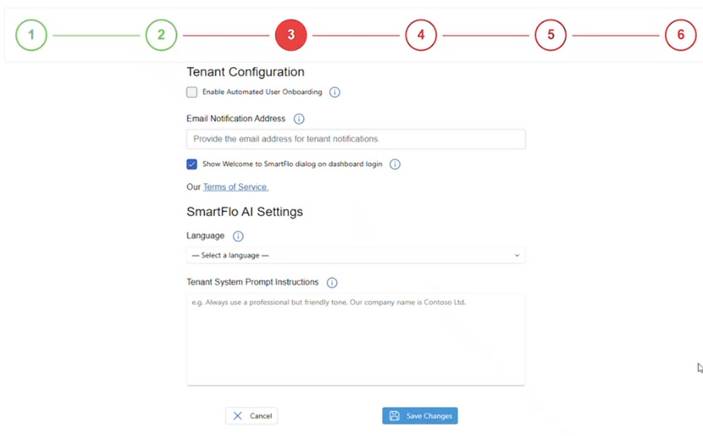 We recommend enabling ‘Automated User Onboarding’. This will automatically create a user account when someone from your organisation signs in.
The Email Notification Address should be the email address of your organisation’s primary contact or administrator.
Select your organisation’s default language, then use the Tenant System Prompt Instructions box to describe your organisation and define how SmartFlo should respond. An example is provided for reference.
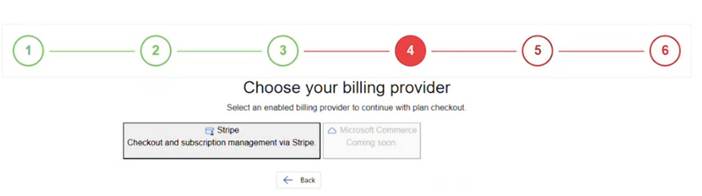
To proceed with payment, select the Stripe checkout option.
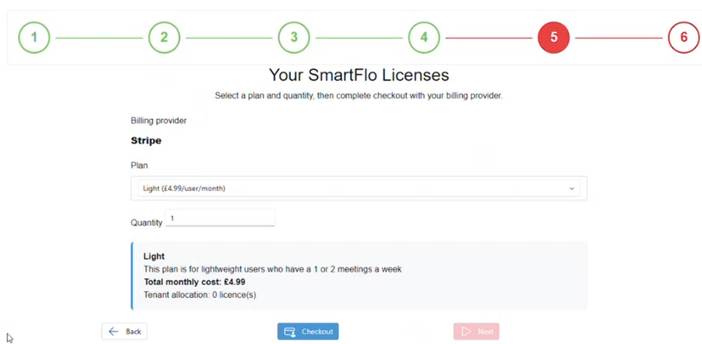
Next, you’ll need to select the appropriate licence plan for your organisation. If you are just getting started, then you can choose the Light version. From here you can start a 7-day trial by simply clicking “Start 7-Day Trial” if you would like to buy the license straight away click Checkout.
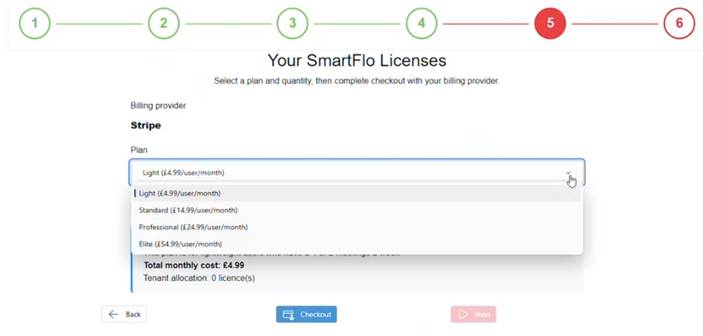
Each plan type includes a set capacity for processing meetings, with higher-tier plans offering increased capacity.
Unlike many other providers, SmartFlo uses pooled capacity, meaning meeting capacity is shared across all users in your organisation, rather than being limited to individuals.
Select your preferred plan then click ‘Checkout’ when you’re ready.
If you choose trial then you will be billed once your trial expires after 7-days, please cancel your subscription if you do not wish to be billed.
Note: Charges will be applied automatically at the end of your trial period unless the subscription is cancelled beforehand.
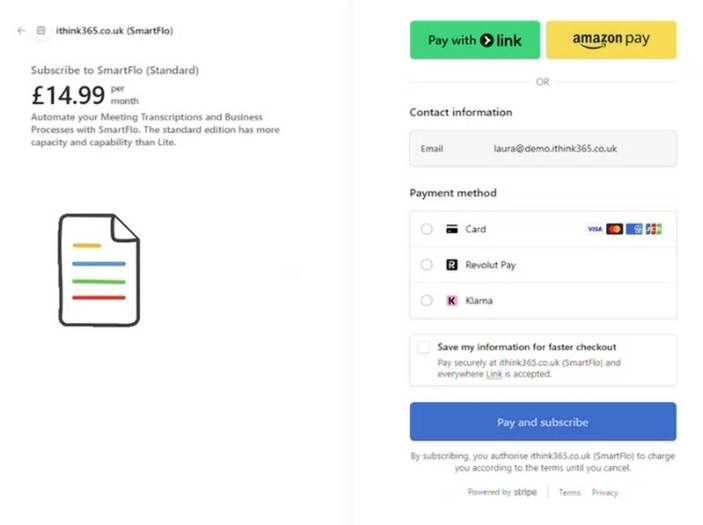
1. To complete the setup, enter your card details and then click ‘Pay and Subscribe’. You will be automatically taken back to the following step.
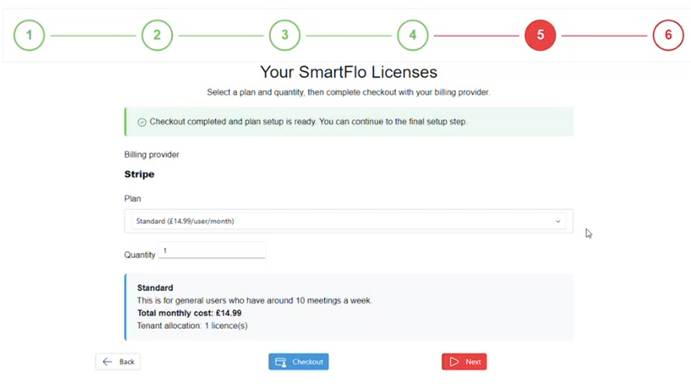 Next, select your chosen plan from the dropdown and click ‘Next’
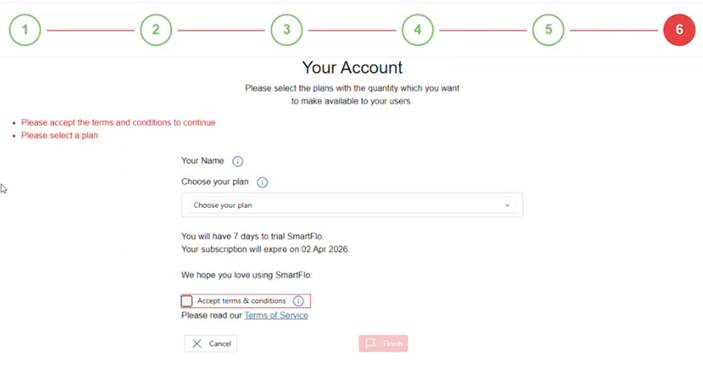
Next, select your chosen plan from the dropdown and accept the ‘terms and conditions’ by ticking the box.
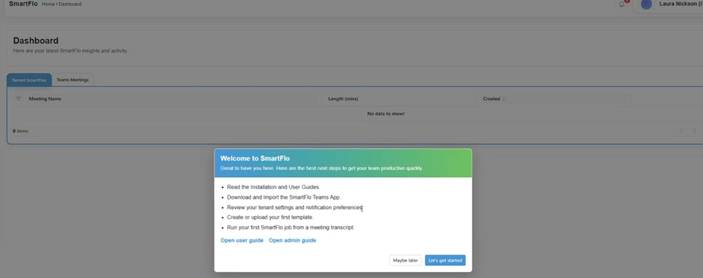
Once complete, you’ll be automatically redirected to the SmartFlo dashboard, as shown below:
Enable SmartFlo to access Microsoft Teams Meetings
SmartFlo requires permission to access your Microsoft 365 data to function correctly.
To allow SmartFlo to access your Microsoft Teams meetings and connect on your behalf, please follow these steps:
- Navigate to https://app.smartflo.ithink365.co.uk
- Click on Settings in the navigation menu.
- Select Advanced from the options available.
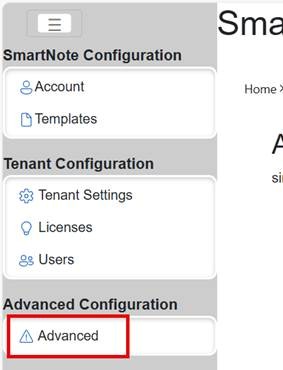
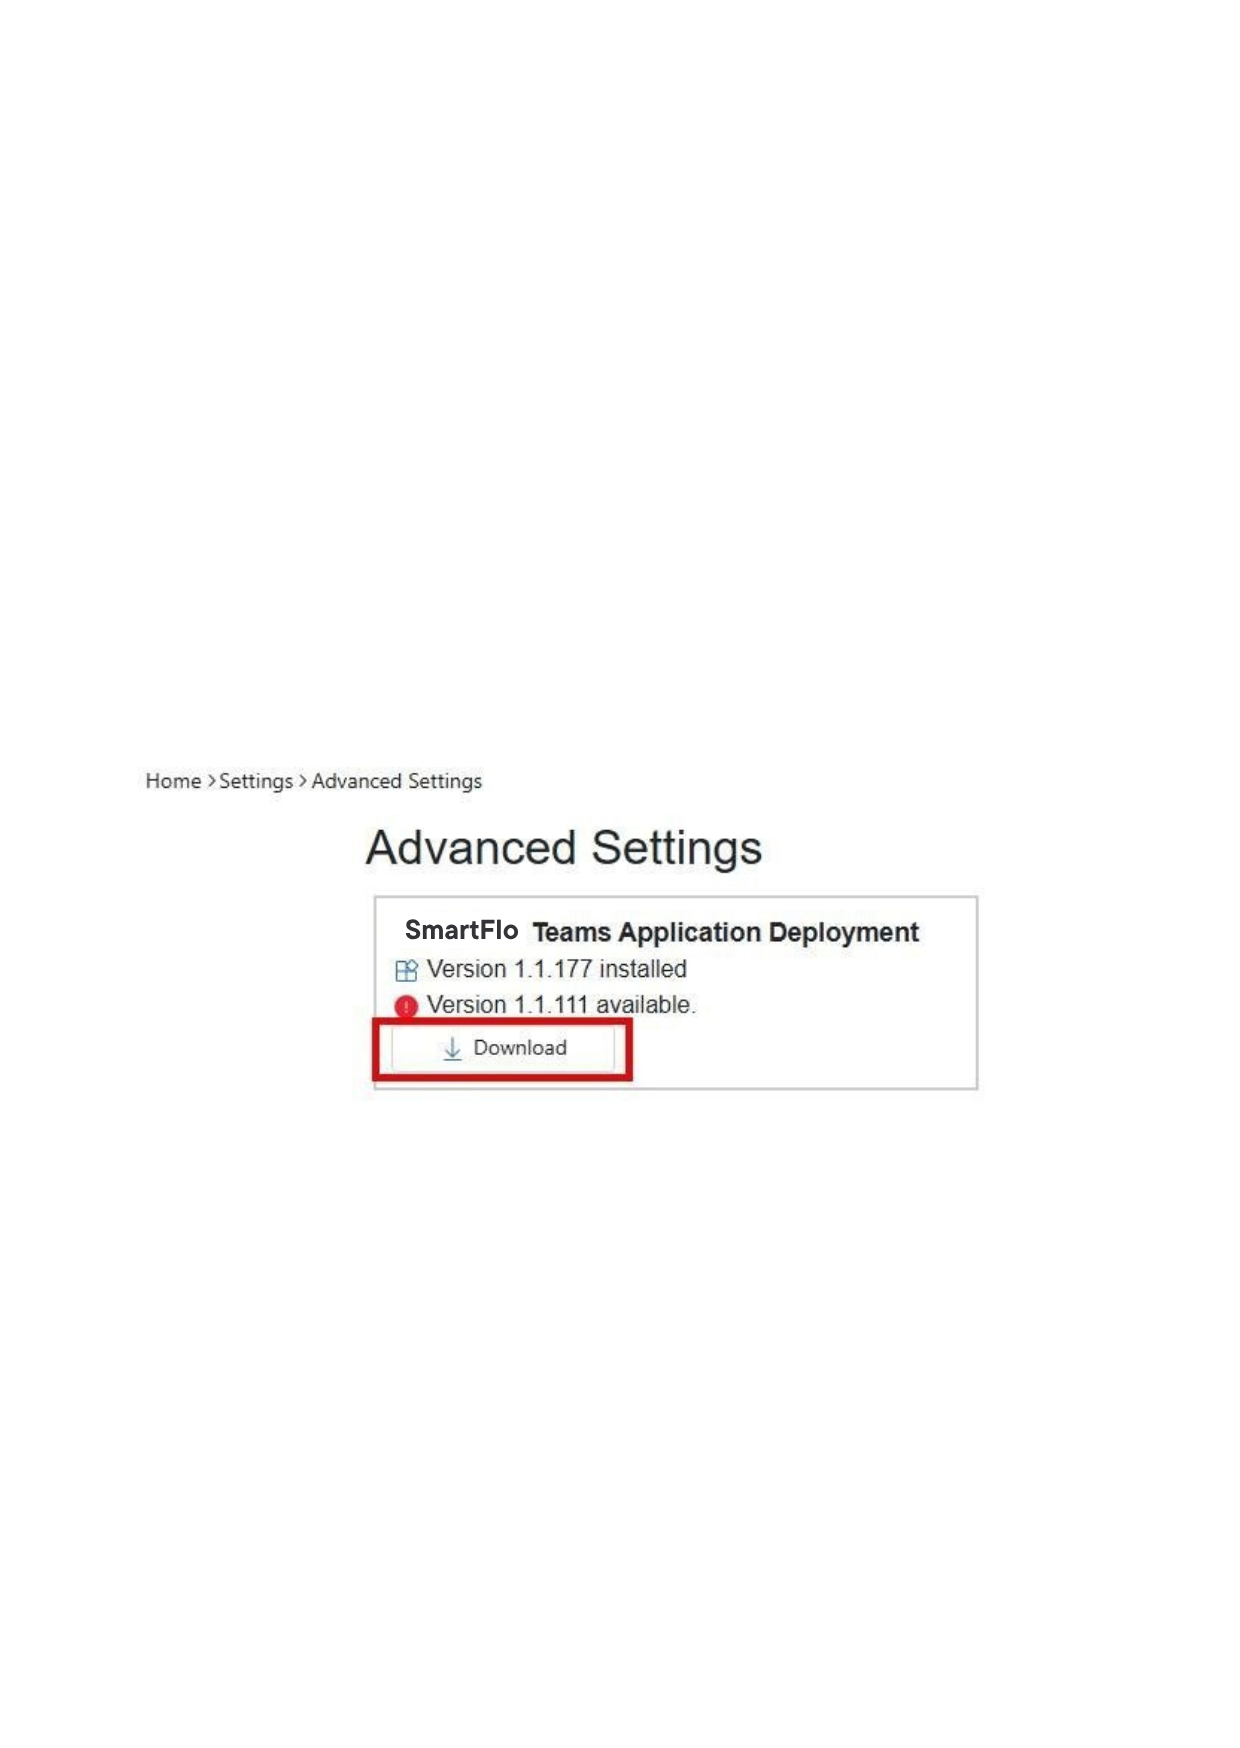
You will be taken to your ‘Advanced Settings’ page as shown below: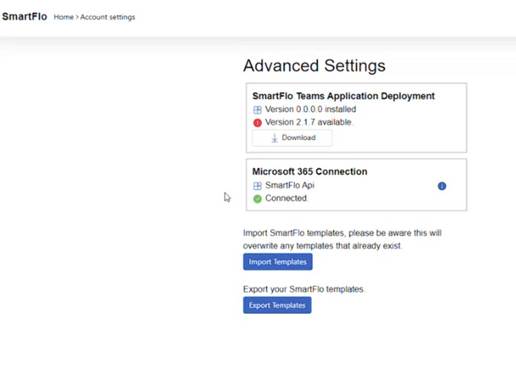
Importing Default SmartFlo Templates
- We have provided you with some starter templates. Download the starter templates using the following link:
1. https://i365smprdsmartflo.blob.core.windows.net/downloads/SmartFlo-starter-templates.zip
- Navigate back to you Smartflo dashboard. Click on Advanced, then select Import Templates.
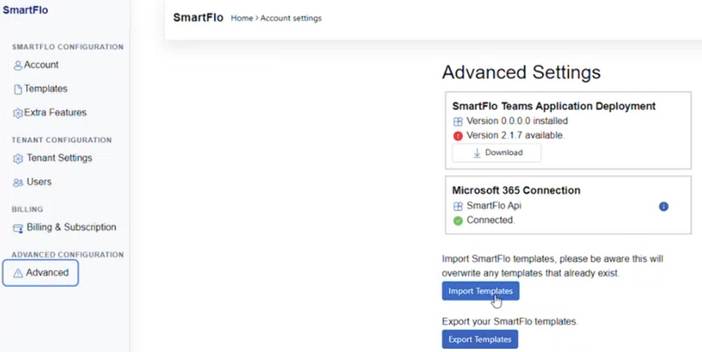
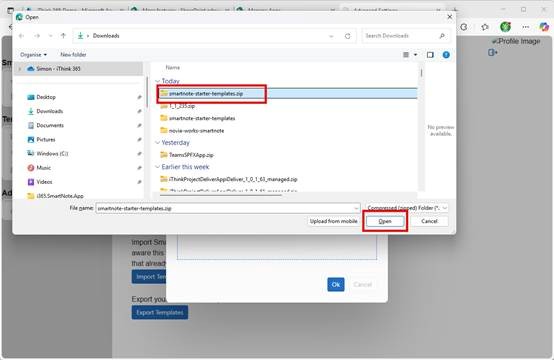
1. Click Browse, locate the SmartFlo-starter-templates.zip file from where you saved it, then click Open.
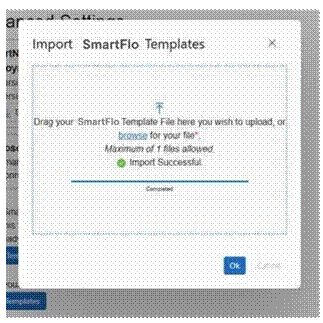
1. Wait for the import to complete and show a success status, then click OK to close the dialog.
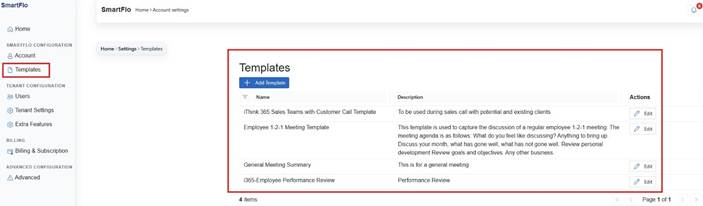
1. To verify the templates have been uploaded, click on Templates.
Download the SmartFlo SharePoint App and Teams Application
- Browse to https://app.smartflo.ithink365.co.uk .
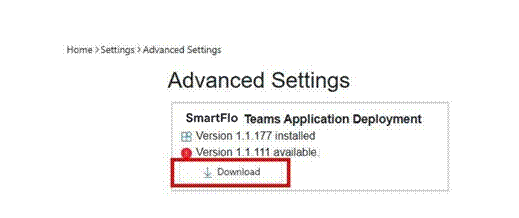
Click on Settings, then Advanced, and under the ‘SmartFlo Teams Application Deployment’ section, click ‘Download’ to upload to the latest version.
- Download the zip file to your local Downloads folder.
- Continue following the next steps below
Please note in most cases, you’ll only need to download the latest upgrade once. After the initial upgrade, future updates usually install automatically. On rare occasions, a manual upgrade may still be required.
Installation of the SmartFlo Microsoft Teams App
Please ensure you are signed in as a Microsoft Teams Administrator with the Microsoft Teams Administrator role in Microsoft Entra ID.
- Browse to the Microsoft Teams Admin Centre at https://admin.teams.microsoft.com
(https://admin.teams.microsoft.com).
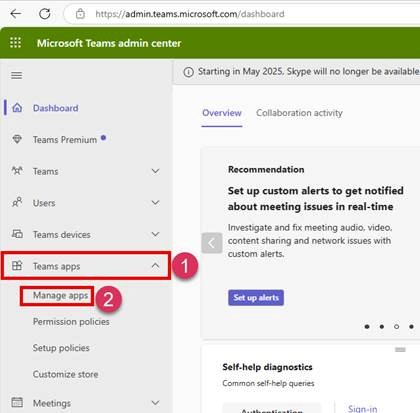
- Click on Teams apps, then select Manage apps.
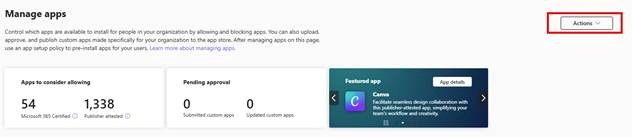
1. In Manage apps, click Actions and select Upload new app.
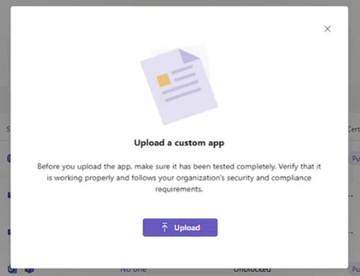
10. Click Upload, select the zip file you downloaded on the previous step file from your downloads folder, and wait for the upload to complete.
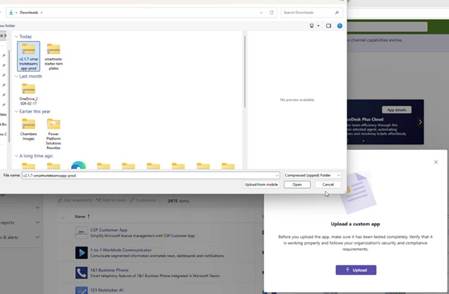
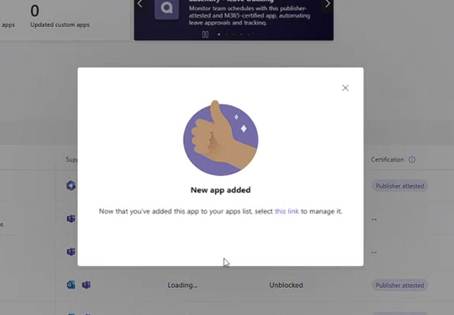
Please note it may take a few seconds to load fully. Once complete, a confirmation popup will appear, as shown below.
Configure SmartFlo Teams App
Once the SmartFlo Teams App has been uploaded, it will not be available to users immediately.
There are several deployment options for rolling out the SmartFlo Teams App. For more details, please refer to the official Microsoft documentation on managing Teams apps:
Managing Microsoft Teams Apps (https://learn.microsoft.com/en-us/microsoftteams/teams-app-setup-policies)
For the purpose of this installation, we will make the application available to select users only.
- Go to the Microsoft Teams Admin Centre at https://admin.teams.microsoft.com
(https://admin.teams.microsoft.com)
- Click on Teams apps followed by Manage apps.
- Find and select SmartFlo.
|
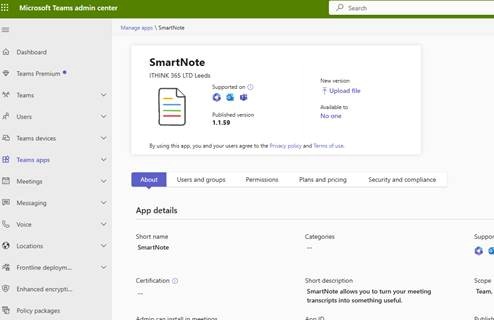
1. To specify which users can access SmartFlo, click on Users and groups
|
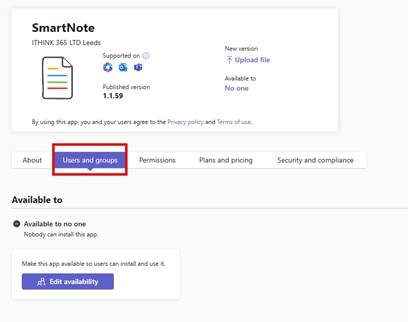
- Click Edit availability.
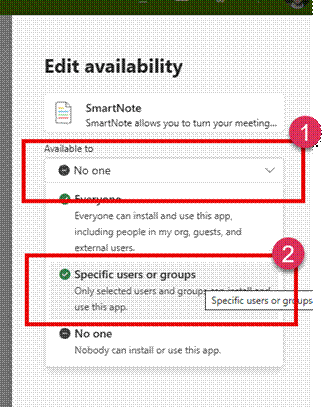
- In the right-hand pane, select No one, then choose Specific users or groups.
|
10. Select the users who should have access to the SmartFlo app by typing their names and choosing them.
|
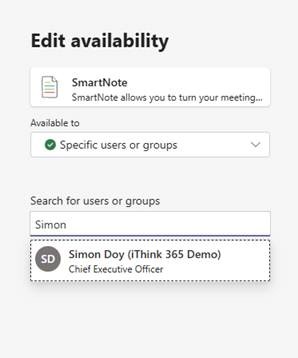
- Alternatively, create a Microsoft Entra ID security group named SmartFlo Users, add the relevant users to this group, and select it here.
- Once you have chosen all users and groups, click Apply.
Note: Microsoft Teams apps can take some time to become available within the Teams client. Restarting the Microsoft Teams application may speed up this process, but it can still take several hours for the app to appear for all users.
Adding SmartFlo to Microsoft Teams
To add the SmartFlo to Microsoft Teams do the following:
- Open Microsoft Teams App or browse to https://teams.microsoft.com (https://teams.microsoft.com)
- In the left-hand navigation pane, select Apps.
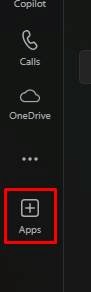
- Click on Built for your organisation
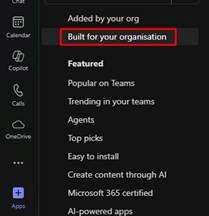
- SmartFlo should now be visible. Click Add.
Note: If you don’t see SmartFlo yet, please allow up to an hour for it to appear.
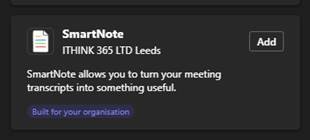
- Choose Add once again.
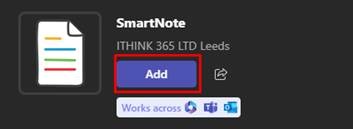
- SmartFlo will now begin installing automatically.
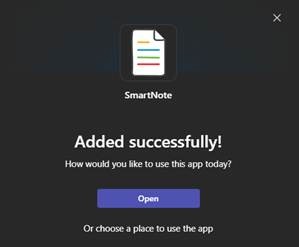
1. Once added, click Open from the Added successfully confirmation message.
1. You’ll then be taken into SmartFlo. Once it loads, it will attempt to find a meeting. However, since the app isn’t currently part of a meeting, you’ll see the message: “Meeting ID is unavailable.”
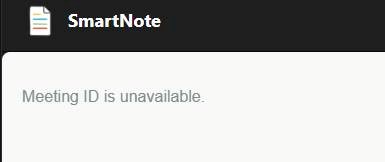
This is expected behaviour for the beta version of the app.
(Please note: loading may take a couple of minutes.)
Automatically adding SmartFlo to Microsoft Teams
Microsoft Teams can be configured to automatically install the SmartFlo Teams application for specific users using Teams Setup Policies.
For detailed guidance, please refer to the Microsoft Learn article:
https://learn.microsoft.com/en-us/microsoftteams/teams-app-setup-policies (https://learn.microsoft.com/enus/microsoftteams/teams-app-setup-policies)
Adding Additional users
For Users
- Ask the user to browse to https://app.SmartFlo.ithink365.co.uk (https://app.SmartFlo.ithink365.co.uk)
- Instruct them to sign in using their Microsoft 365 / Entra ID account.
- After signing in, the user will be automatically added to your SmartFlo tenant.
For Administrators
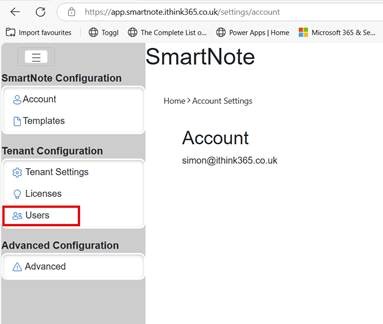
- As an administrator, log in to SmartFlo.
- Navigate to Settings > Users.
|
- 1. Locate the newly added user and click View.
- 1. Select the appropriate application role and licence plan to assign to the user. If you cannot select a role, you will need to add an additional licence in the Licences section. Once that is done, you will be able to assign a plan to the user.
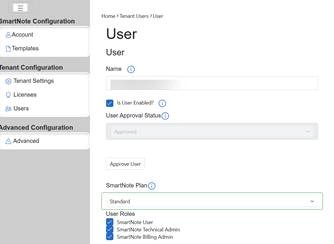
- Click Save.
- Ask the user to sign out and sign back into SmartFlo to activate their access.
- Ask the user to log back into SmartFlo and they will now be able to use SmartFlo.
Buying More Licences
If you would like to purchase more licences, go to ‘Billing & Subscription’ and click ‘Stripe’.
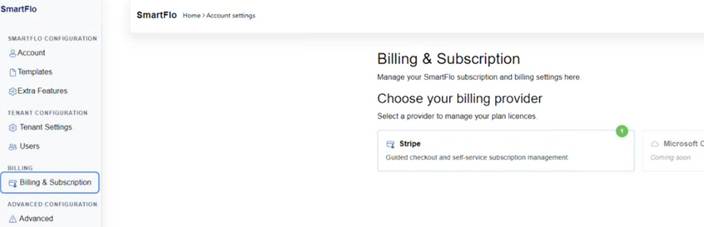
It will display a list of plans and how many you are currently subscribed for.
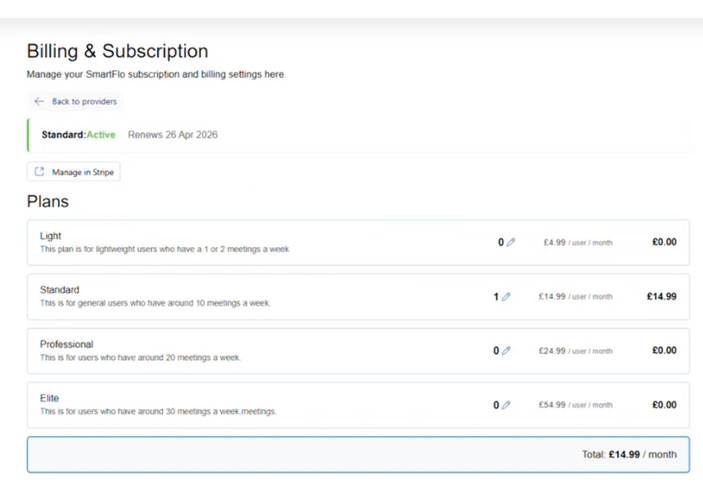 If you want to update your plan, click on the pencil icon and change the number of users. For change to 2 and click on ‘Update’ It will automatically update Stripe.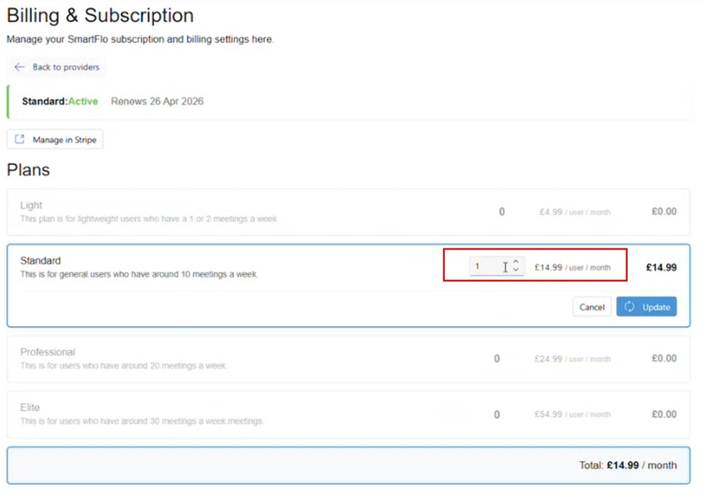
Subscription Cancellation
To cancel a SmartFlo subscription, go to ‘Billing & Subscription’ and click ‘Stripe’. Click on ‘Manage in Stripe’
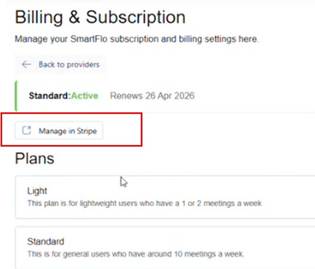
You’ll be taken to your current subscription page, and you’ll see a ‘Cancel Subscription’ on the top far right-hand side of the screen. Click to cancel. 
To get back to your Billing & Subscription page,
Click on the icon (shown below) in the top left-hand side of the page.