
Last updated
26th June 2026
Overview
SmartFlo is an application that uses Generative AI to make life easier by taking Microsoft Teams meeting notes and turning them into something useful for you and your team.
Examples include:
Turning Boardroom meeting notes into beautifully presented Boardroom meeting minutes.
Taking Sales call meeting notes and turning them into a customer sales summary meeting document.
This user guide will help you with the following:
- Understanding how to set up your SmartFlo templates.
- Understanding how to use SmartFlo with your Microsoft Teams meetings.
- Help you set up Microsoft Teams meetings that work with SmartFlo
Let’s get started!
Accessing SmartFlo
Firstly, you access SmartFlo from within Microsoft Teams. It is an application that is added to Microsoft Team.
Hopefully your IT team have already added it for you but if not, it’s not a problem, you’ll just need to follow the instructions below.
Adding SmartFlo to Microsoft Teams
To add SmartFlo to Microsoft Teams do the following:
Open Microsoft Teams App or browse to https://teams.microsoft.com

Choose Apps from the left handrail.
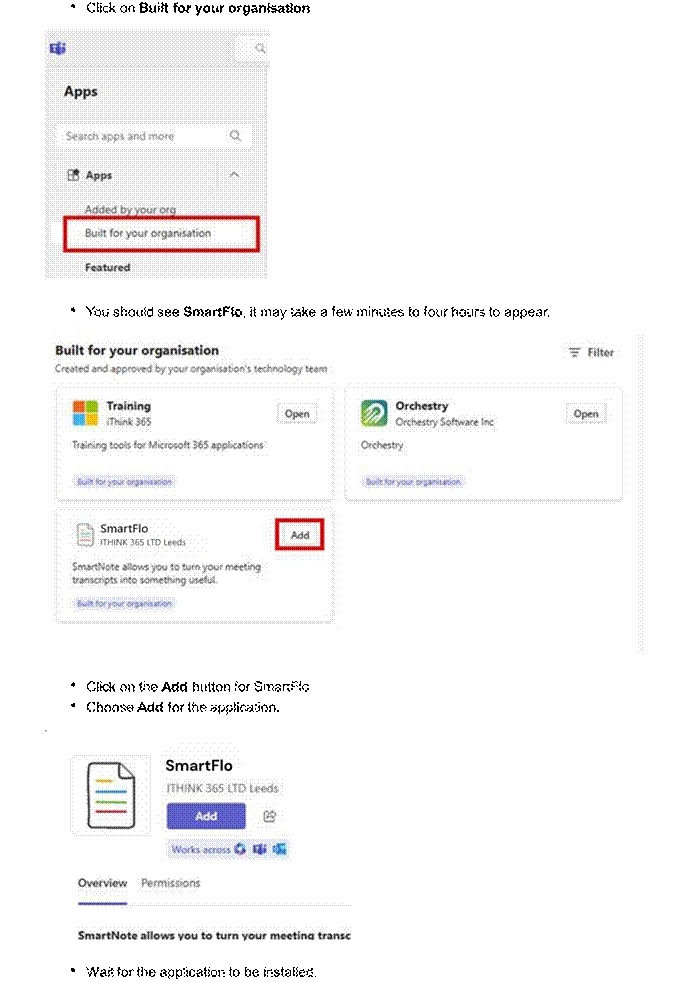
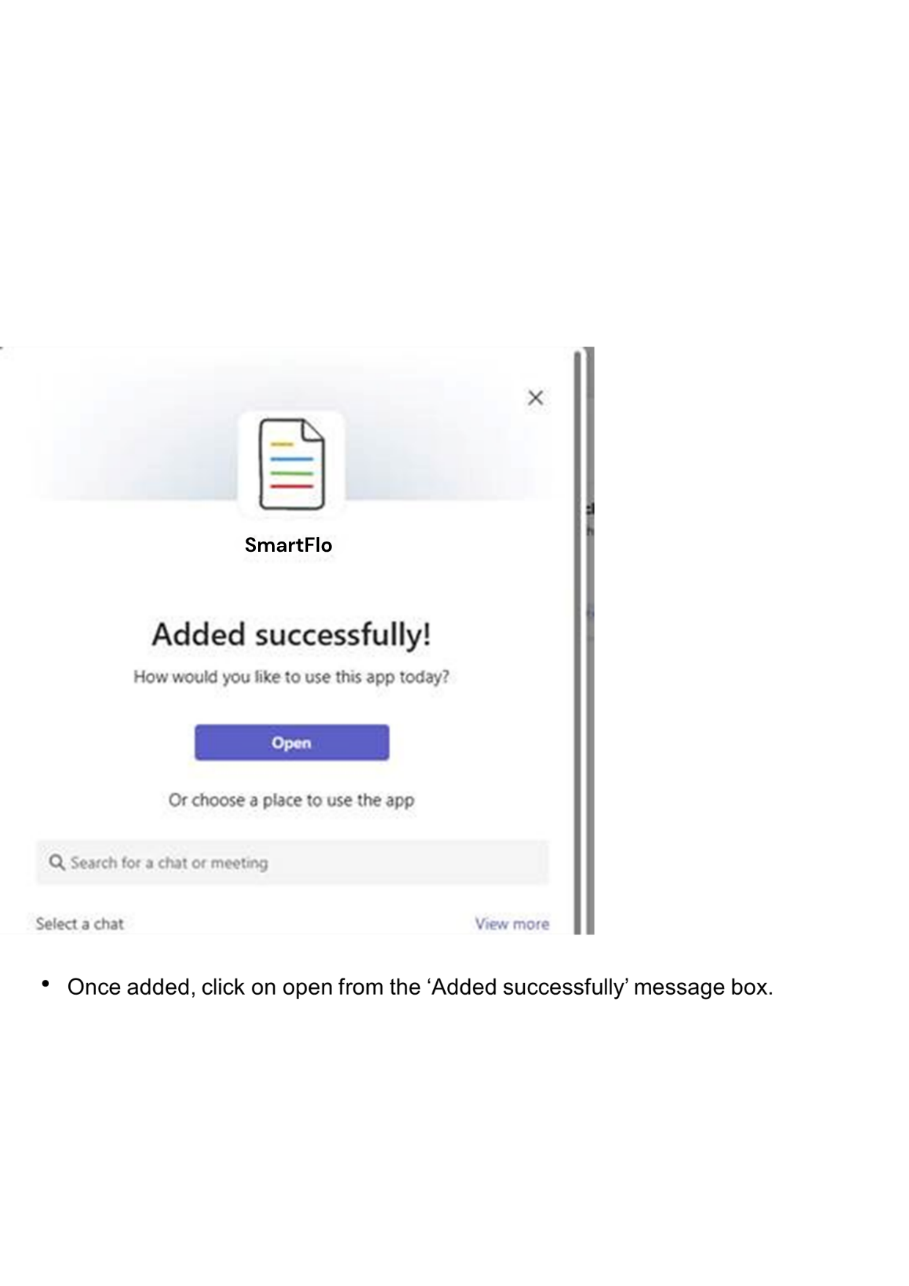
Elevated Calendar Access
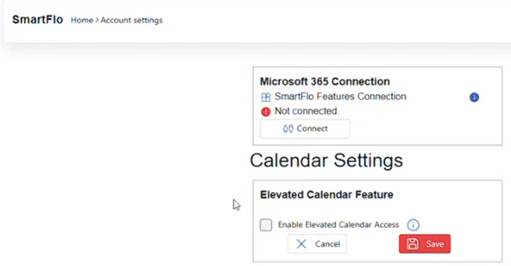
To help improve the experience of your users and allow them to access meetings that they have attended. We recommend enabling the Elevated Calendar Feature. Please note: the user must either Accept the meeting invite or at least Follow the meeting to ensure they have access to it in SmartFlo. If they decline the meeting, they will not be able to view it their SmartFlo dashboard
- Go to ‘Extra Features’ and enable Elevated Calendar Access.
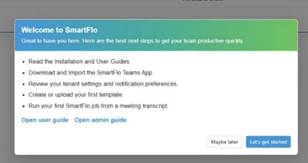
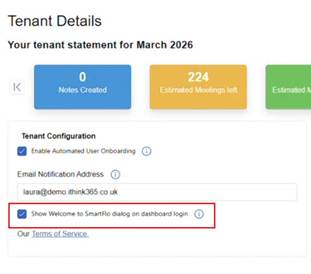
To stop the welcome message from appearing, go to ‘Tenant Settings’, untick Show Welcome to SmartFlo dialog on dashboard login, as shown below, and select ‘Save Changes’.
SmartFlo Meetings
All SmartFlo meetings are displayed in your SmartFlo App https://app.SmartFlo.ithink365.co.uk/, as long as the meeting has been recorded and/or transcribed.
Make sure your meeting is recorded
You can do this in one of two ways:
Option 1: Set this up before the meeting
- Open your meeting in Microsoft Teams.
- Go to Meeting options.
- Turn on Record & Transcribe automatically.
- Save your changes.
Option 2: Start recording during the meeting
- While in the Teams meeting, click the three dots (More).
- Select Start transcription (recording will begin automatically if enabled).
Once transcription is on, SmartFlo will be able to access the meeting after it ends.

View your meeting in SmartFlo
- After the meeting has finished, open the SmartFlo app.
- Go to the Teams Meetings tab.
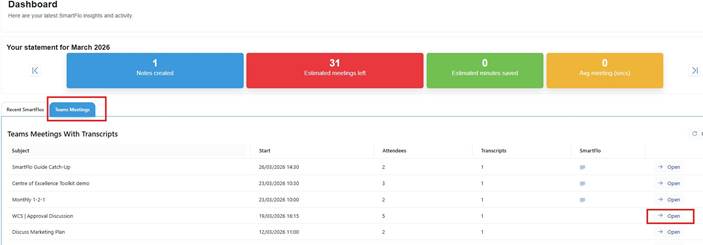
- Your most recent recorded meetings will be listed here.
Creating Your SmartFlo Document from a Meeting
Open your meeting
- In the Teams Meetings tab, locate the meeting you want to use.
- Click Open to view the meeting details.
Select the meeting transcript
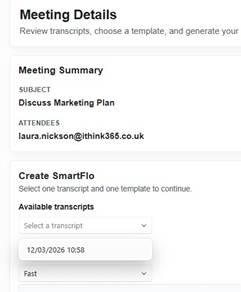
- Go to Available Transcripts.
- Choose the correct transcript from the drop‑down menu.
Choose a reasoning approach (if available for your plan)
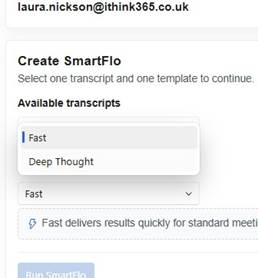
Go to Reasoning approach and select one of the following:
- Fast
Best for standard meetings that are shorter and less detailed. - Deep Thought
Ideal for longer meetings that cover complex or technical detail.
Please note: choosing Deep Thought will take longer to generate the document.
Choose a template
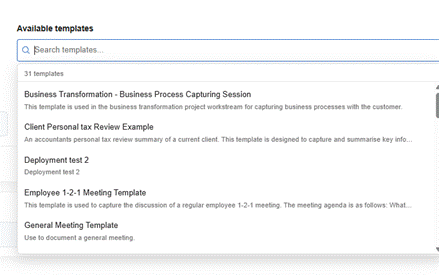
- Go to Available templates.
- Select the template you want to use for your document, or search for one instead. Each template also includes a short description to help you choose.
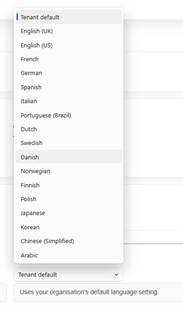
Select the output language (if available on your plan)
- Under Output language, choose your preferred language from the drop‑down list.
Run SmartFlo
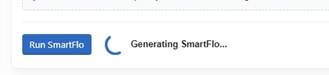
- Click Run SmartFlo.
- SmartFlo will begin generating your document.
- Once completed, you’ll see a success message.

Downloading Your SmartFlo Document
Option 1: Download immediately
- Use the download option shown on the success screen once the document has been generated.
Option 2: Download later from the dashboard
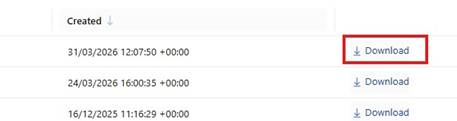
- Go to Recent SmartFlo in the SmartFlo dashboard.
- Your document will be listed with:
- Meeting length
- Date created
- Click Download to save the document.
Creating Your First SmartFlo Word Template
SmartFlo uses Microsoft Word to create a document for your SmartFlo content.
We will need to create a template with the various sections that you wish to have within your personalised document.
Your document format will depend on your use case and what you wish to share with your audience.
In this example, we have a document template that is used for a Sales Discovery Call. Let’s go through the process of creating it.
In this example we are using an iThink 365 document template which is likely to be different to what you have. Please do not add anything specific around the customer or a specific meeting unless it applies to all your meetings where this template would be used.
Now, create the sections for your document template. In this example our document already has a title and a placeholder for Customer.
For the main body of the document, create the sections you need.
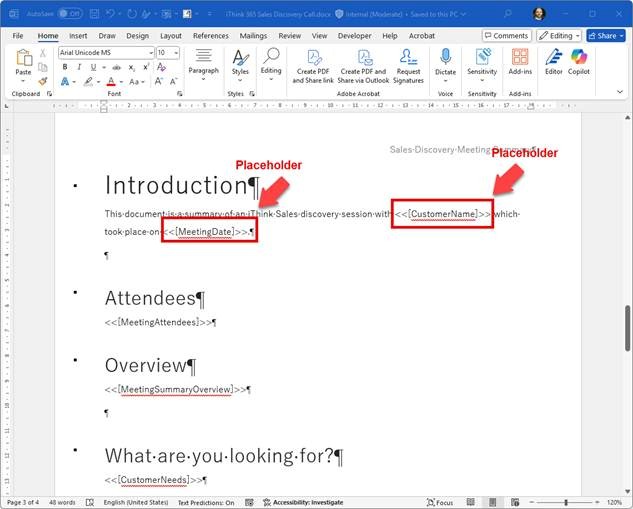
IMPORTANT - Configure Placeholders everywhere you want SmartFlo to fill out content in the document.
A placeholder always has the following format <<[PlaceholderName]>>
For example <<[MeetingSummaryOverview]>>
The <<[ and ]>> are really important and tell SmartFlo that there is a placeholder which needs to be filled out. Complete your document with the appropriate placeholders that you require to provide all the information for your finished document.
If you have a table of contents, do not forget to update it once you have finished.
Please Check Your Placeholders
When filling out placeholders please make sure that you do not have spaces in the placeholder name.
For example
<<[MeetingDate]>> is OK
<<[Meeting Date]>> is NOT OK.
Configuring a SmartFlo Template
Note: Make sure you have configured the SmartFlo template before proceeding with these steps. If you haven't done so, please refer to the previous section, Creating Your First SmartFlo Word Template, for guidance.
- Navigate to the SmartFlo app. Click on ‘Settings’ and ‘Templates’.
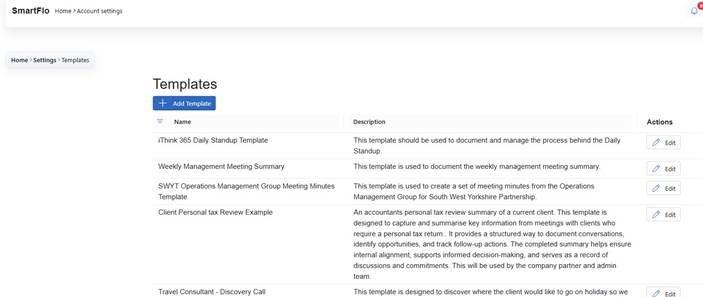
- To upload your SmartFlo template click on ‘Add Template’ and upload your template.
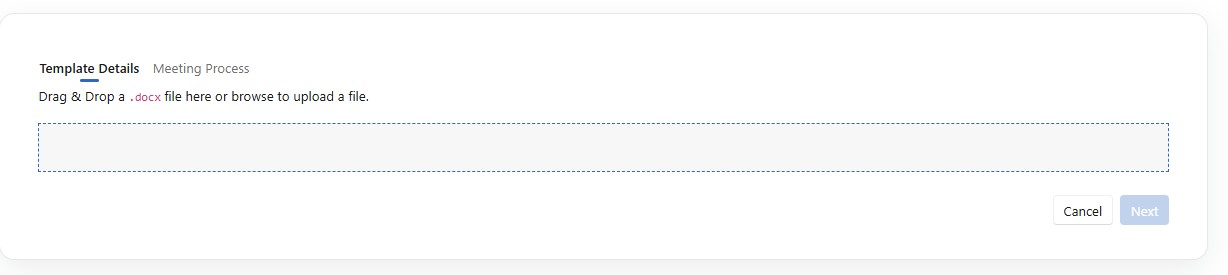 The template will be processed and the placeholders that you created in the document template will be identified and extracted. This might take a few minutes.
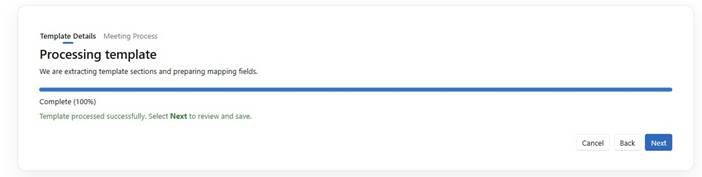
Click ‘Next’
You will now see the following page for your Template Details.
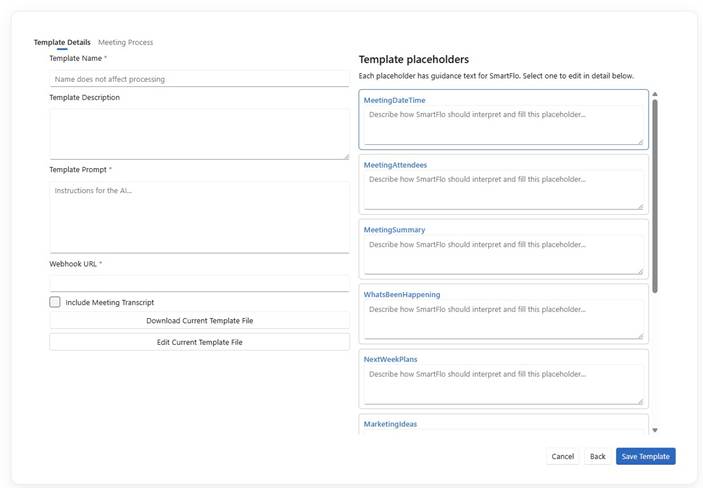
Please provide a name for the template and description. This will help you find the right template when you want to use it in the future.
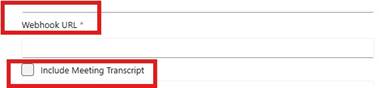
Before we continue to build our template prompts it's good to be aware of two available options. The Webhook URL and the Inclusion of Meeting Transcript (as highlighted in the image below)
‘Webhook UR’ - SmartFlo can be connected to any business process or system via webhooks using Power Platform or Azure.
If you would like to integrate SmartFlo with other systems such as CRM you can use this to do that.
Please reach out to us to find out more.
‘Include Meeting Transcript’ - This feature will also send the meeting transcript through to the webhook URL.
Now that we covered that this is where the real work beings!
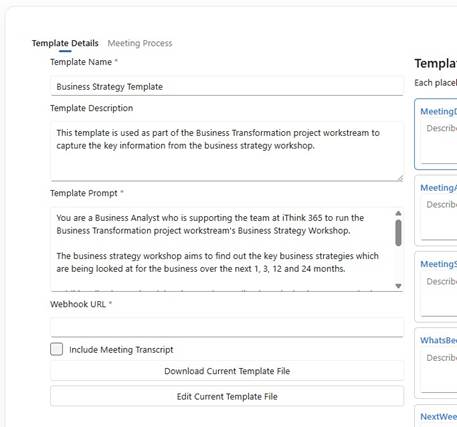
Now we need to use the Template Prompt to help set the scene for the SmartFlo AI to be able to understand how to fill out the document.
Please try and provide the following details to help SmartFlo work best for you.
Template Prompt
The Template Prompt should have the following information:
Goal – what is it that you ultimately want to get from the document when it has been filled out?
Context – why do you need this information? What is the role that SmartFlo is playing in gathering this information. For example, is SmartFlo helping a Project Manager, a Salesperson, a marketing person or a consultant.
Source – what is the information that SmartFlo is using to build its response from? Example, this meeting is with a customer and a salesperson at iThink 365.
Expectation – What are you expecting from SmartFlo, what would make a good result? Please ensure you provide as much detail about the conversations as possible in your answers.
Here are some examples which use the GCSE framework or Goal, Context, Source and Expectation.
Sales Executive Sales Discovery Call Prompt
Goal: You are supporting a Sales Executive at iThink 365 by documenting the key information from a meeting between a Sales Executive and a customer.
Context: Please provide as much information as you can when filling out the document.
Source: However, please do not make anything up. If you do not know the answer to the question, please say "No information found".
Expectation: Please use professional tone. The content that is being created will be shared with the customer.
Project Management Weekly Standup Call Prompt
Goal: You are a Product Administrator who is supporting a Project Manager at iThink 365 by documenting the weekly project standup where the iThink 365 project team meet with the customer and the rest of the project team to discuss the project, what activities have been taking place this week, what is planned for next week and any blockers or issues or questions that have arised.
Context: Please provide as much information as you can when filling out the document.
Source: The meeting is a project status weekly standup meeting. However, please do not make anything up. If you do not know the answer to the question, please say "No information found".
Expectation: Please use professional tone. The content that is being created will be shared with the customer and the project team.
Once you have completed your template prompt, then move on to the placeholders for the replaceable items.
Completing the Placeholders
The next step is to tell SmartFlo how to complete and fill out each of the placeholders that you created in your document template. All of the placeholders have been created based on the document template that you previously uploaded.
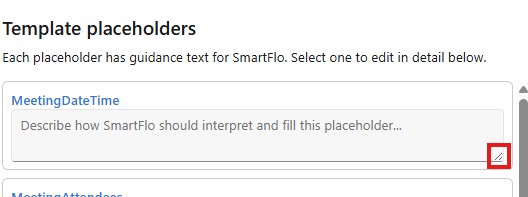
For each placeholder fill out a prompt to help SmartFlo how to fill out the template section.
Please use the examples below to help you.
You can ask the prompt to format responses as tables with columns or bullet points if that helps you get the information across.
You can make the text area bigger by clicking and dragging the bottom right corner of each text area.
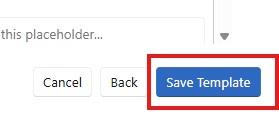
Once you have filled out the template, reviewed the information, then click Save Template to save the template.
To help you complete the placeholder information we have provided some examples below:
Customer Name
Please fill out the name of the company that the meeting took place with. If you cannot work out the customer’s name from the meeting transcript use the name of the attendee / attendees but do not include anyone from iThink 365.
Meeting Date
Please fill out the date of the meeting using the meeting transcript. Please use the format day, date, month and year.
Meeting Attendees
Please fill out the list of people who attended the meeting, please format them as a list of bullet points. Please use their name and email address if it can be worked out.
Meeting Summary Overview
This section is one of the most important sections in the document and should provide a detailed summary of the discussion points that occurred in the meeting. Please make sure you pay attention to any opportunities that were discussed where iThink 365 could help the customer. Provide as much detail as possible.
Customer Needs
Please fill out this section with information provided by the customer where they detail what they are looking for and what they need help with from iThink 365 or a similar company.
Customer Challenges
Please fill out this section with any challenges or pain points that the customer mentions. For example, we have problems with this process or finding this information.
Please provide as much context around the challenges / pain points as possible.
Discussion Points
Please provide a list of discussion areas or topics that were discussed. This will help iThink 365 and the customer to hear the key topic areas that we discussed in the meeting.
Meeting Outcome
Please provide two paragraphs that detail the outcomes from the meeting that were discussed between the parties. This might include activities that either the customer was going to do or information or discussions that iThink 365 were going to take.
This will help iThink 365 and the customer understand what the outputs are and what the next steps are.
Next Steps
Please fill out this section using a table of actions and the next steps. These are activities or actions that either party said that they would do following the meeting.
Please format the next steps with a summary paragraph and then a table of actions which includes the following columns, Name, Description, Assigned To, Due Date.
Please provide the name of the next step, a brief description of the step, who said they were going to do it and the due date. If no due date can be found, then set the due date to 10 days in the future of today.
Meeting Proces
The ‘Meeting Process’ tab (as shown below) will give you the ability to add a checklist and supporting documentation which will be available during your meeting when you use your template.
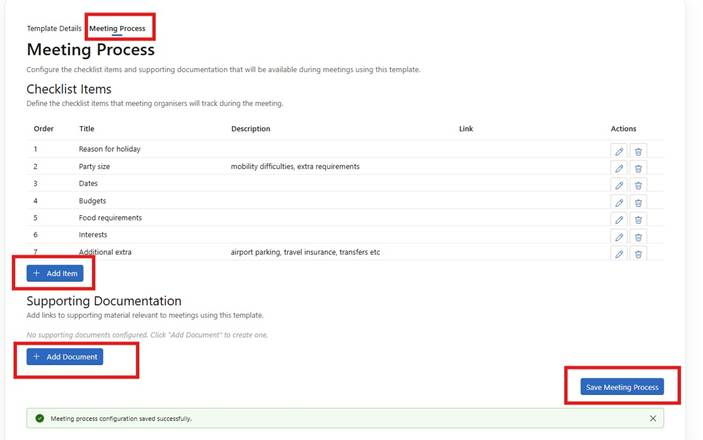
The example above gives you an idea of a checklist. To add items to your checklist simply click on ‘+ Add Item’.
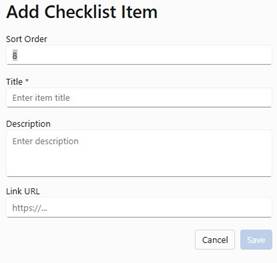
Once you have completed the relevant checklist information just click ‘Save’. You can even add any relevant links to your checklist item.
If you want to add supporting documentation, just click on ‘+ Add Document’. You will then need to input the link of the relevant document you would like to see whilst you are in your meeting.
Don’t forget to ‘Save Meeting Process’ once you have updated your checklist items.
Viewing Your Checklist Whilst in a Meeting.
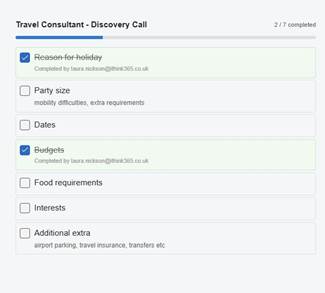
Please note the only person who will be able to view the checklist is the meeting coordinator.
First step: Click on the SmartFlo icon.
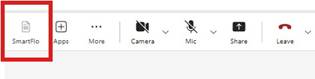
Second step: Locate and click on your template
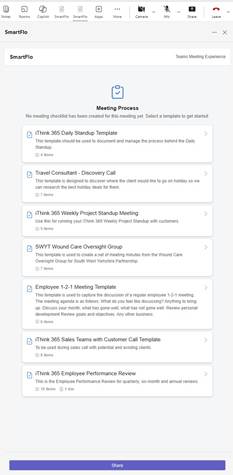
Step three: You will now see your checklist items on the right-hand side of your meeting, making it easier to keep track of and cover all the points you want to raise with your team. Once a point has been discussed, tick the box on the left-hand side of the checklist to cross it off and clearly see what has been covered.
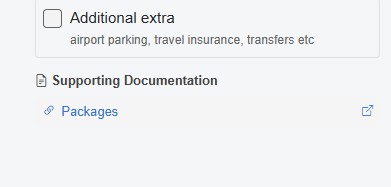
If you have included a link to any supporting documents in your ‘Meeting Process‘ then these documents will be shown at the very bottom of your checklist.
You can, if needed, share your checklist with. Just click on ‘Share’ and this will share your checklist screenshare with others on the meetings.

Accessing the SmartFlo Dashboard
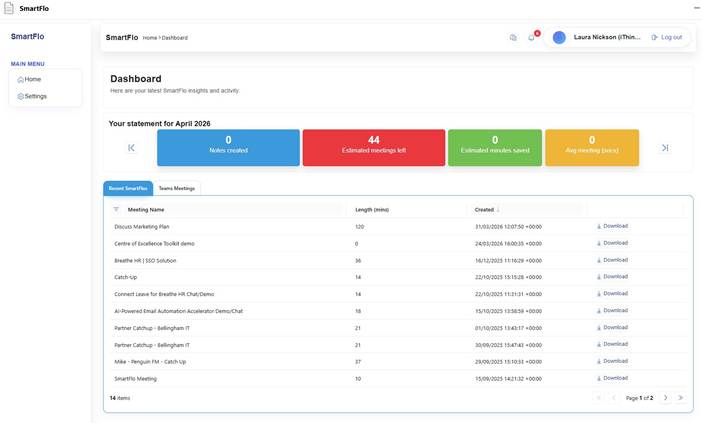
SmartFlo has a Dashboard where you can find more details about your usage and also see the SmartFlo jobs that you have recently created.
To access the SmartFlo Dashboard do one of the following:
- Browse to https://app.smartflo.ithink365.co.uk Or
- From Microsoft Teams open SmartFlo. Click on the SmartFlo dashboard.
An overview of the SmartFlo Dashboar
From the SmartFlo dashboard, you can see the following information:
- How many SmartFlos you have created this period.
- How many SmartFlo powered meetings we estimate you have left.
- Your average meeting length.
- The plan that you have been assigned.
Keeping in touch
Find out about the latest news, updates, tips and tricks and releases to SmartFlo through the latest news feature.
You can access this feature by clicking on the bell icon at the very top right of SmartFlos dashboard page.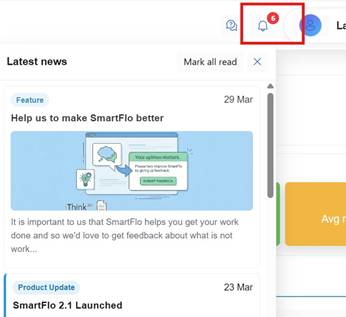
Help us make SmartFlo better
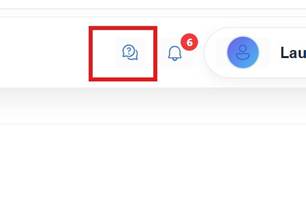
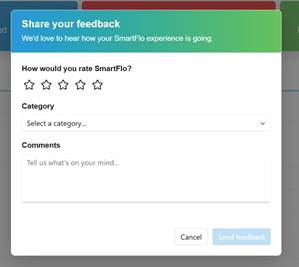
We hope you love SmartFlo but there will be things that you wish were better or included. Let us know using the SmartFlo feedback feature.
You can access this feature by clicking on the question mark icon at the very top right of SmartFlos dashboard page.
Frequently Asked Questions
The following section details frequently asked questions.
Q: The content that is being created by SmartFlo does not have all the information that I was expecting. What can I do?
A: Update your document template and update the template prompt and the description for each section to give SmartFlo more information about what you need from it.
Additionally, if the meeting notes do not contain the information you require then you will need to ensure that in your meeting you cover the questions or content that you have asked on your template.